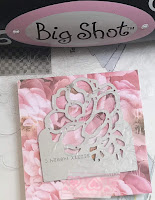
For some reason I was really nervous in the video so Im hoping that if I waffled a load of old rubbish then this pictorial and written view will be helpful :)
I have linked the products I used at the bottom of this post. Enjoy!
1 - Cut a piece of Very Vanilla cardstock to measure 2" wide x 6" long to create the tag base.
2 - Place the floral die at the top of your piece of cardstock. Make sure the die sides are lined up (or centralised if you are using a wider piece of card) with the sides of the card. Use a piece of tape to hold the die in place. Run it through the die cutting machine. Put to one side.
3 - With a scrap piece of DSP (Designer Series Paper) die cut the same shape as you used to create the tag base. Remove the die from the paper and add the outline die piece across the leaves area being careful to align it. Run it through the die cutting machine again and this will release a complete die cut shape. Repeat this process with a piece of Mossy Meadow cardstock together with the vine die.
4 - Cut away the leaves from both the die cut flowers with small fine pointed scissors.
5 - Place glue on the back of the die cut leaves you will be using and attach to the tag base.
6 - Place glue on the back of the die cut flower and attach to the tag base. Trim off the end leaf off the top of the vine and attach to the tag base next to the leaves. Ink the edges of you tag, attach pockets or any other decorations you so wish at this point
I hope you enjoyed this project and were inspired to give it a try. Please remember that some of the items are now on limited stock and that Sale-A-Bration ends on the 31st March.
HERE IS THE LINK TO THE VIDEO -
The items I used in this project are (clickable links) :
VERY VANILLA CARDSTOCK
MOSSY MEADOW CARD
PETAL PROMENADE DSP
BOTANICAL TAGS THINLITS DIES
BIG SHOT DIE CUTTING MACHINE
SILICONE CRAFT SHEET
GLUE
MUSIC BACK GROUND STAMP


